

We will learn how to easily set up an event or conversion when someone clicks a specific button via Google Tag Manager.
In previous articles, we have explained how to install Tag Manager and the Facebook Pixel, and how to set up custom events for it.
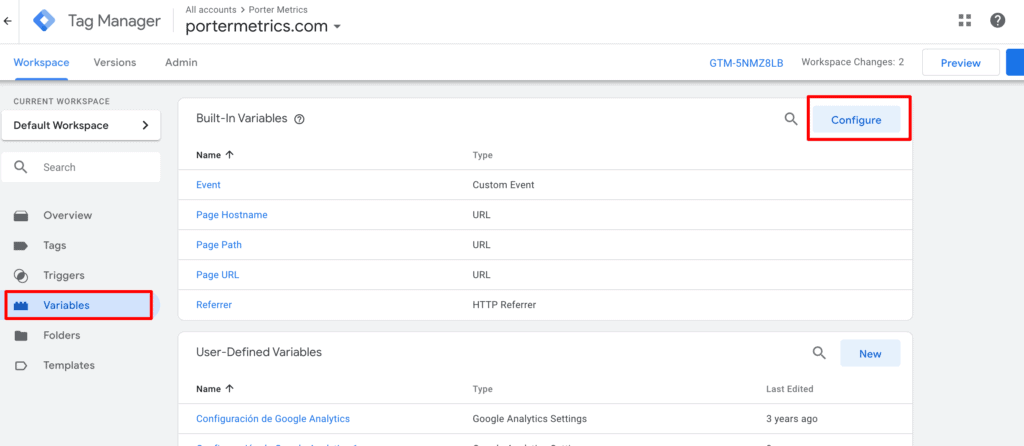
Setting up variables
Go to Google Tag Manager – Variables – Configure.
Here, we will check the kind of events we want to trigger and log. In this case, we want to go to the Clicks section—which is ideal for buttons and links—and check them all.
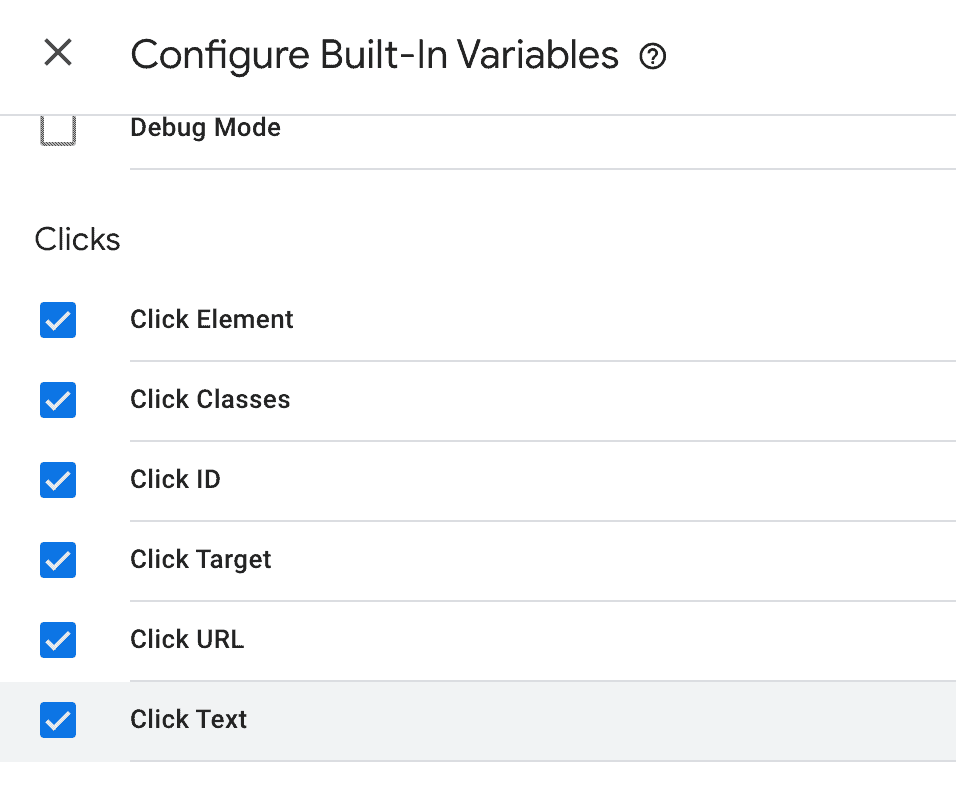
You don’t need to be familiar with elements, classes, IDs, and so on.
Just have in mind that every element of a webpage, like a button, have a set of variables that you can use to identify them.
We may say, for instance, I want to set up an event in all buttons whose links got to “web.whatsapp.com”; or we want to fire an event in all buttons whose text is “Click here”.
Whichever is the element you want to set as the criteria for triggering an event, it is in this variables list.
Finding out variables in buttons
It’s time to figure out all the variables that our website buttons have.
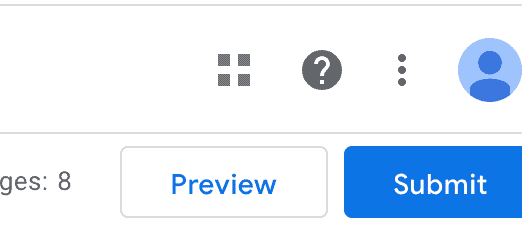
Just click on Preview, located in the top-right corner of Google Tag Manager.
Once done, you will see this message, notifying the Google Tag Manager debug mode is on.

Now, go to to your website and you will start seeing a new panel that will show all the events and elements Google Tag Manager is detecting.
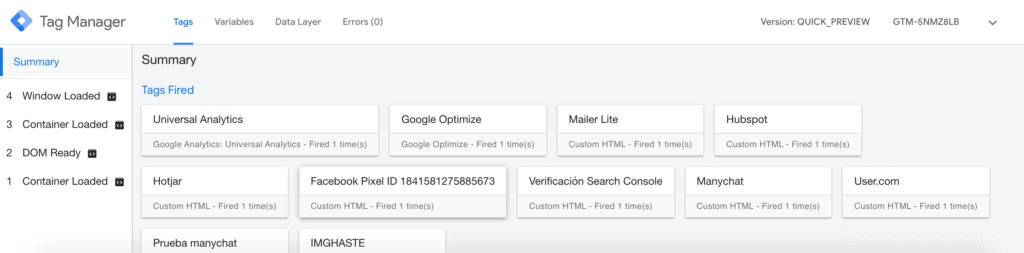
If I click on an element of a webpage, you will see a new log called link click.
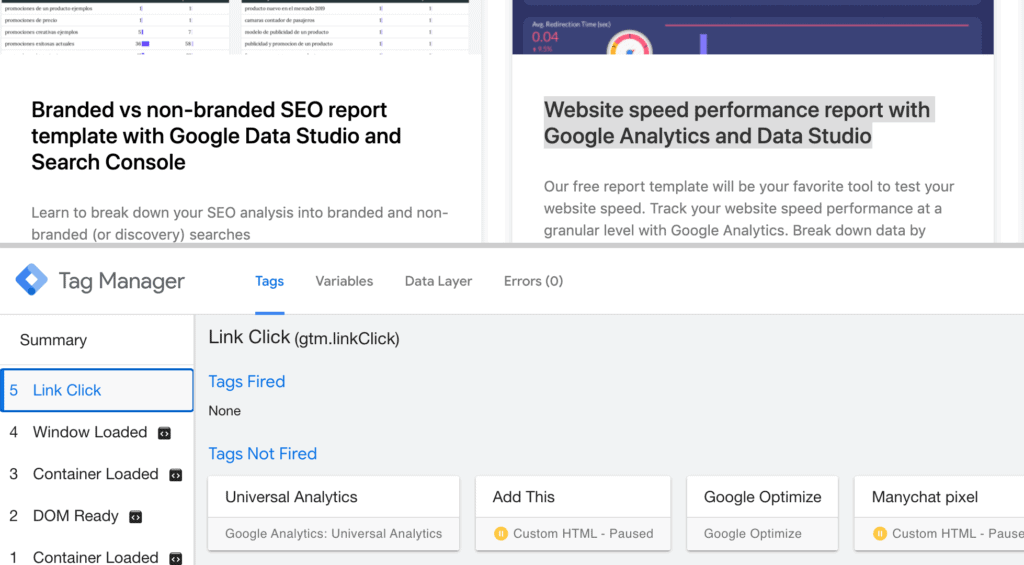
Then, go to the variables tag and wou will see all the variables values that the link click triggered.
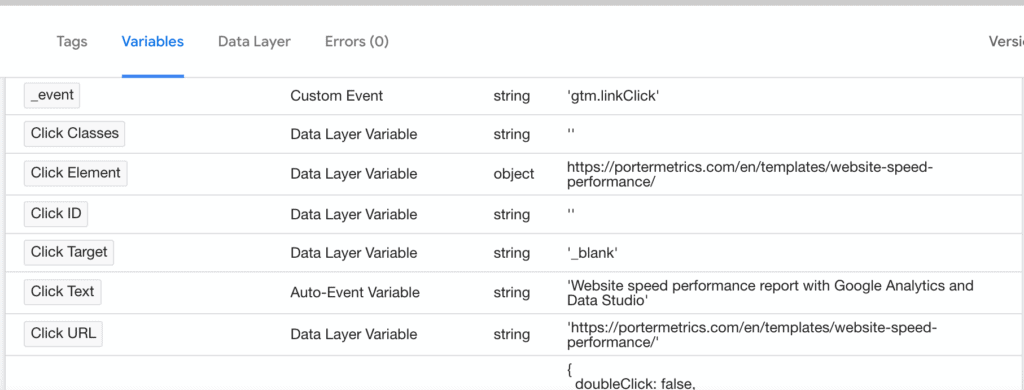
These variables values may define the parameters we will use to set up an event through a conditional.
For instance, we will log an event when the click URL (i.e. the URL of the button link) contains “/website-speed-performance/”.
And that’s exactly that we will do.
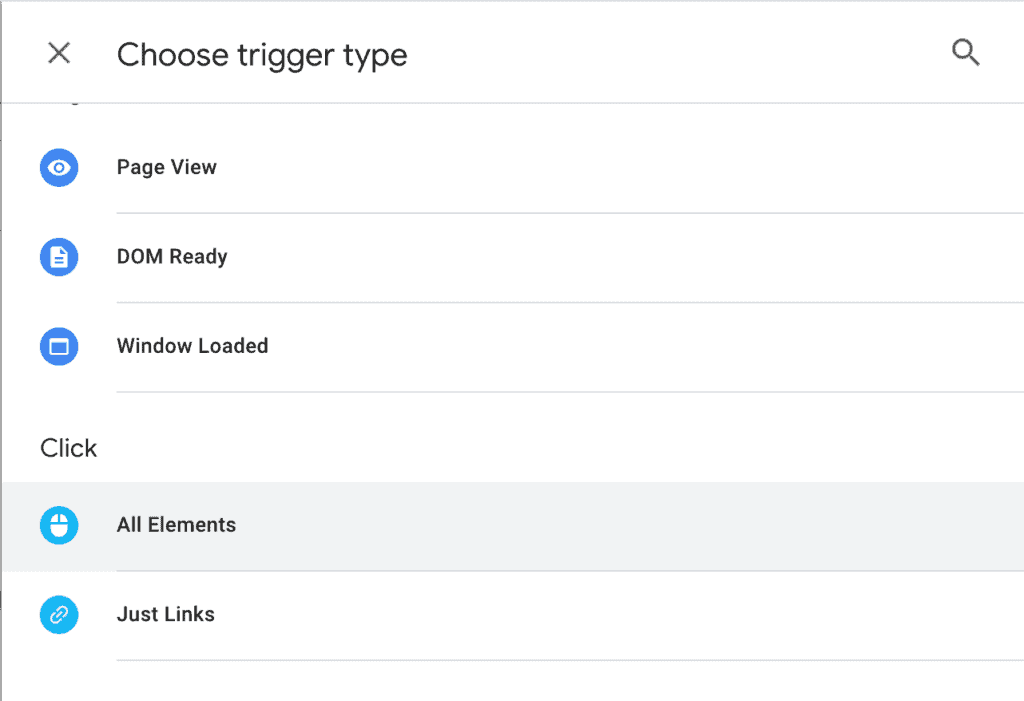
Let’s go back to Google Tag Manager and leave the debug mode, go to Triggers and create a new trigger.
As trigger type, choose All elements.
Now, set up a new trigger a condition with the parameters we mentioned before:
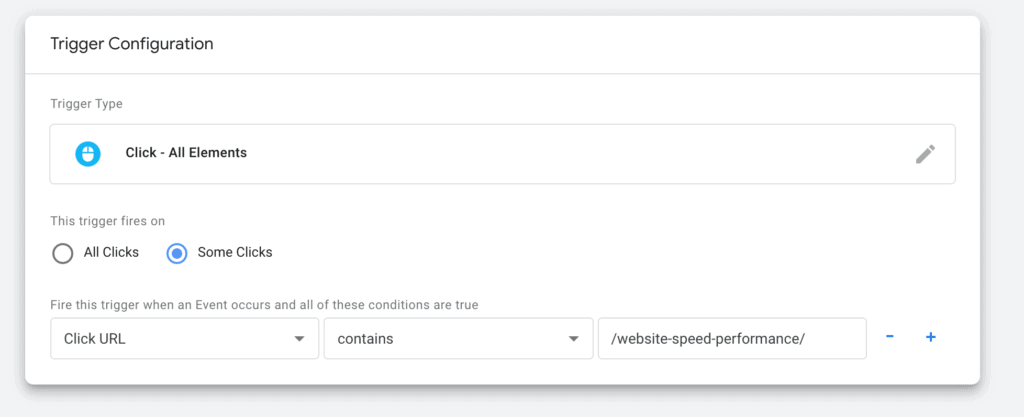
In this case, we will fire a trigger every time someone clicks on a link whose destination URL contains “/website-speed-performance/”.
Now, to set up the event, we need to associate our new trigger to a Google Analytics tag, so Tag Manager knows this is an Analytics event.
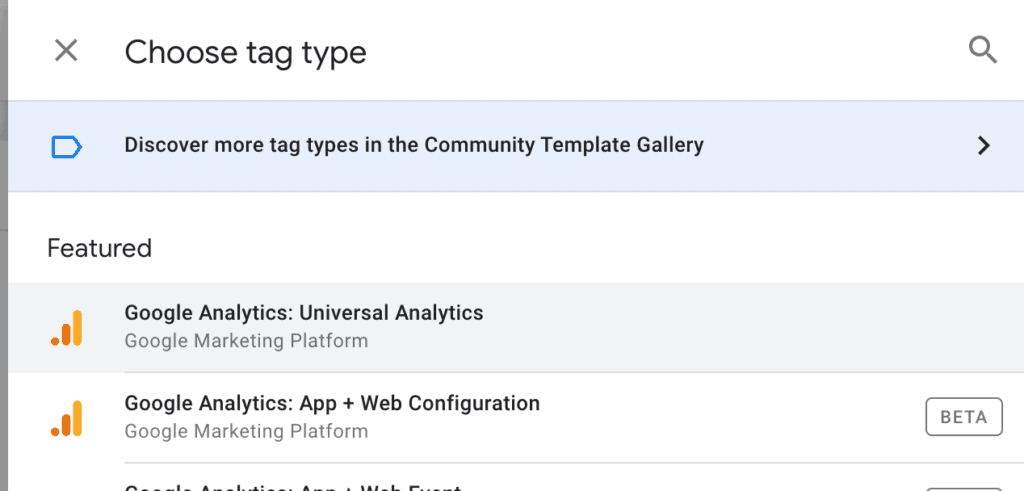
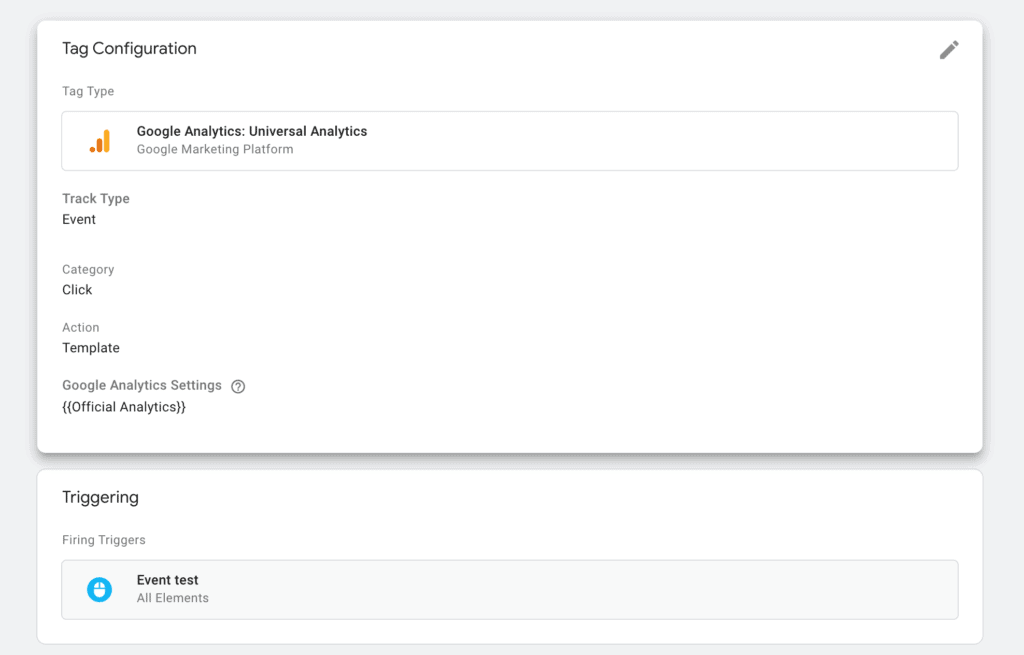
It’s dead simple. Go to Tags, create a new tag, and choose Google Analytics: Universal Analytics.
Then, you should fill a set of parameters.
Choose Event as track type, and all parameters names are optional. They will give a structure for future events.
For instance, you may have multiple events that you want that fall within the “Click” category”.
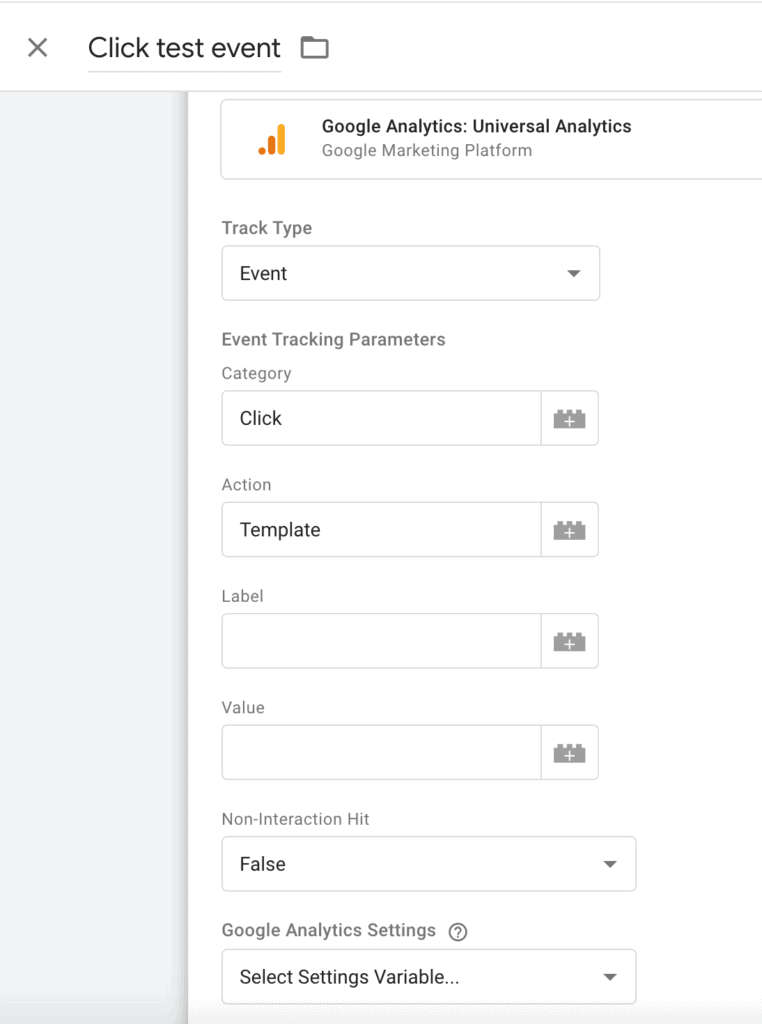
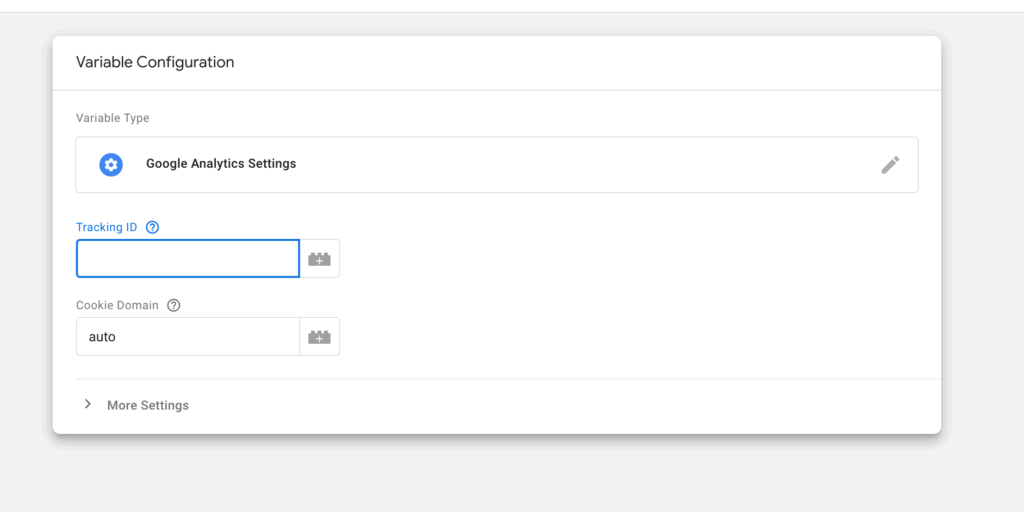
In the last field—in Google Analytics Settings— choose the Google Analytics account you want to use to associate this event. If you don’t find it, go to New Variable.
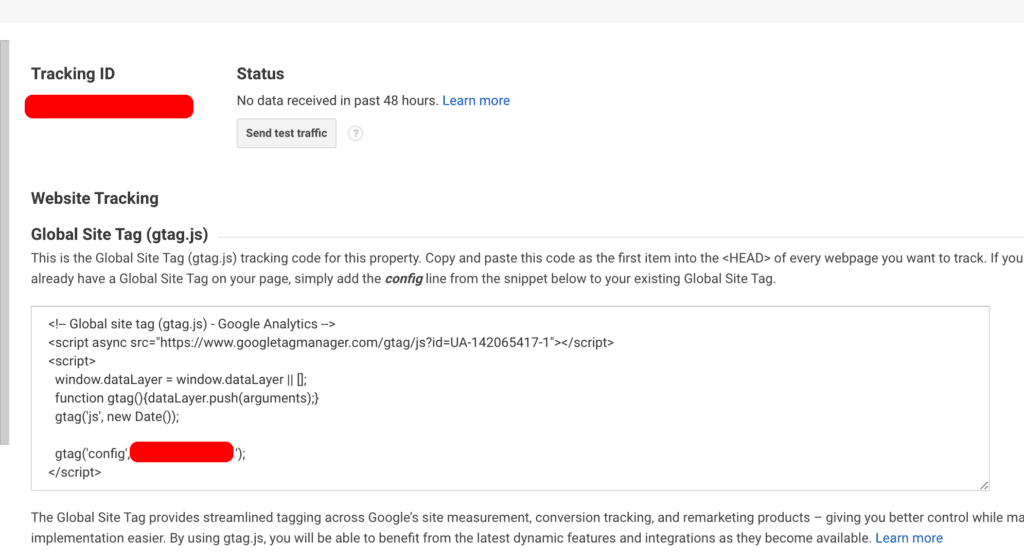
You will only need to paste your Google Analytics tracking ID.
To find it, go to Google Analytics – Admin – Tracking info – Tracking code.
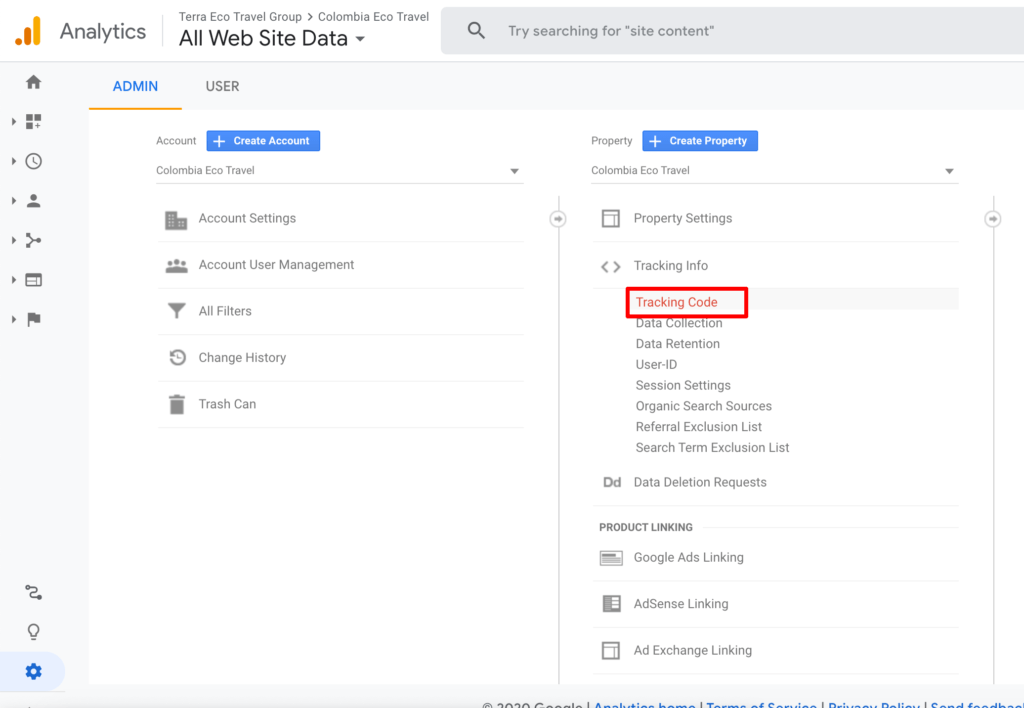
And copy-paste the ID displayed in the top-left corner.
Once you save, choose the trigger we’ve just created.
Click on Publish and we’re done.
Verifying our button event is firing correctly
Go to Google Analytics – Real Time – Events.
In this view, you will see all the events that are being triggered in real time. So we will go to the website and we will click the button or link event with which we setup the trigger.
And here’s how it looks like when fired correctly:
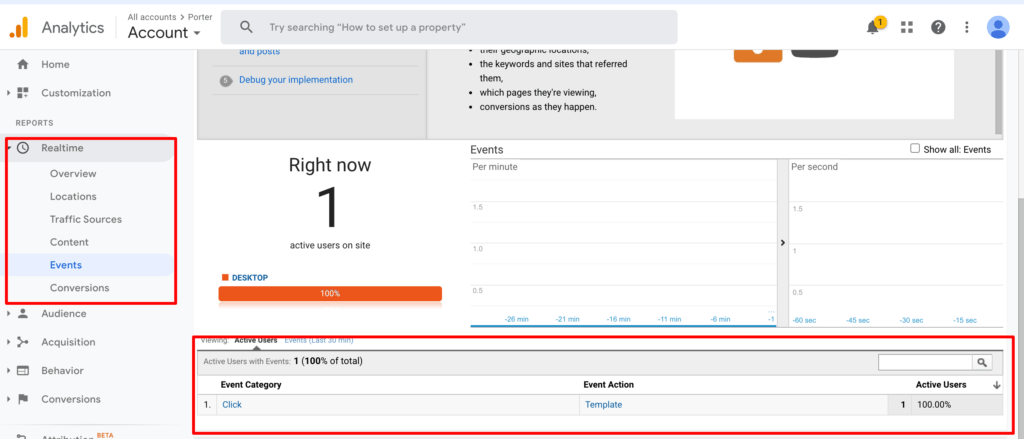
As you can see, Google Analytics is logging an event with our setup. It works perfectly.
What’s next
We’re publishing new tutorials, tools, and posts every week. Don’t miss some of our latest releases: